Showing posts with label Woodworking. Show all posts

Thursday, June 14, 2012

You win some, you lose some

This project I was SO excited about doing! Unfortunately it didn't go as planned.  I guess every project can't go perfectly.  Let me explain a little better.  When I was a kid my Mom made these cute little wooden houses. The details that were painted on are so cute and delicate looking.   It wasn't anything overly complicated though and since it's something I've looked at my whole life I thought "HEY I could make these!"  HA! easier said then done!

I decided it would be so fun to make it into a girls night project with my sisters. So I cut up a bunch of 2 x4's into little 4 to 6 inch houses.  Using 1x3's or 1x4's to cut out some chimneys and extra parts of the houses.  That's where I came across my first speed bump.  I didn't realise how hard it would be to us a saw on such small pieces!  I would not recommend it unless you have the right tools, otherwise you are at risk of loosing some fingers!

Well, with the help of my neighbor and sister's tools I had it all cut out.  Gathered up some paint and found the smallest paintbrush I could find for painting details and we all got to work.  I feel so bad I took a bunch of pictures while we all painted and now I can't find them! I put off posting about this long enough so it will have to do with out them.  Just envision a mess of paint and houses all over a big table.

After we decided on house colors and got the roof and base color on we quickly found out just how hard it is to paint details! My tiny paintbrush wasn't small enough and it was so hard to keep a steady hand to make perfect straight lines.  We worked on it for a few hours and I don't think any of us completed one house.  I left feeling completely defeated and in awe over my Mom's amazing art work on her houses from years before.

After a few weeks break from it I decided to try again and managed to make one house look not to bad.  Whatcha think?:


Then I let it go again a few weeks and yesterday decided enough was enough I was gonna give it my best go at it then if it didn't work out, forget it!

This time I let my kids paint on the left over houses.  They loved it! and it keep them busy for an hour or more. Perfect summer project :)


Well I'm not that happy with the results and am pretty embarrassed to show them to you but I figured there might be actual artists out there that could see these and and use this idea to make super cute houses.


Well sorry to make you suffer through this one I'll be back with something better soon!

Pin It!

Wednesday, May 16, 2012

DIY Stool (photog prop)

I've had a few different photo sessions last week and through this week and I really wanted a little stool of some kind to sit kids on. Well the easiest way for me to get what I want/need is to make it!   I actually started out thinking I'd make more of a crate but by the time I was half way done I decided to try something different.  I'm so glad I did!  I love the way it turned out!

Here's what I did:

I still have pallet wood left so most of this is made from pallet wood.
I mostly just eyeballed the width/length/height that I wanted it to end up.  I also used a basket that was about the measurements I needed to help me come up with what to cut the wood at.

Start out by cutting two length pieces and two width and nail or screw together.  I started out with nails, mostly because I was experimenting as I went along.  Then I went back and added screws to secure it all together.


Then cut the board to go on top.  I tried to cut them so they were flush with the frame.  My cuts are not perfect but I like the roughed look.


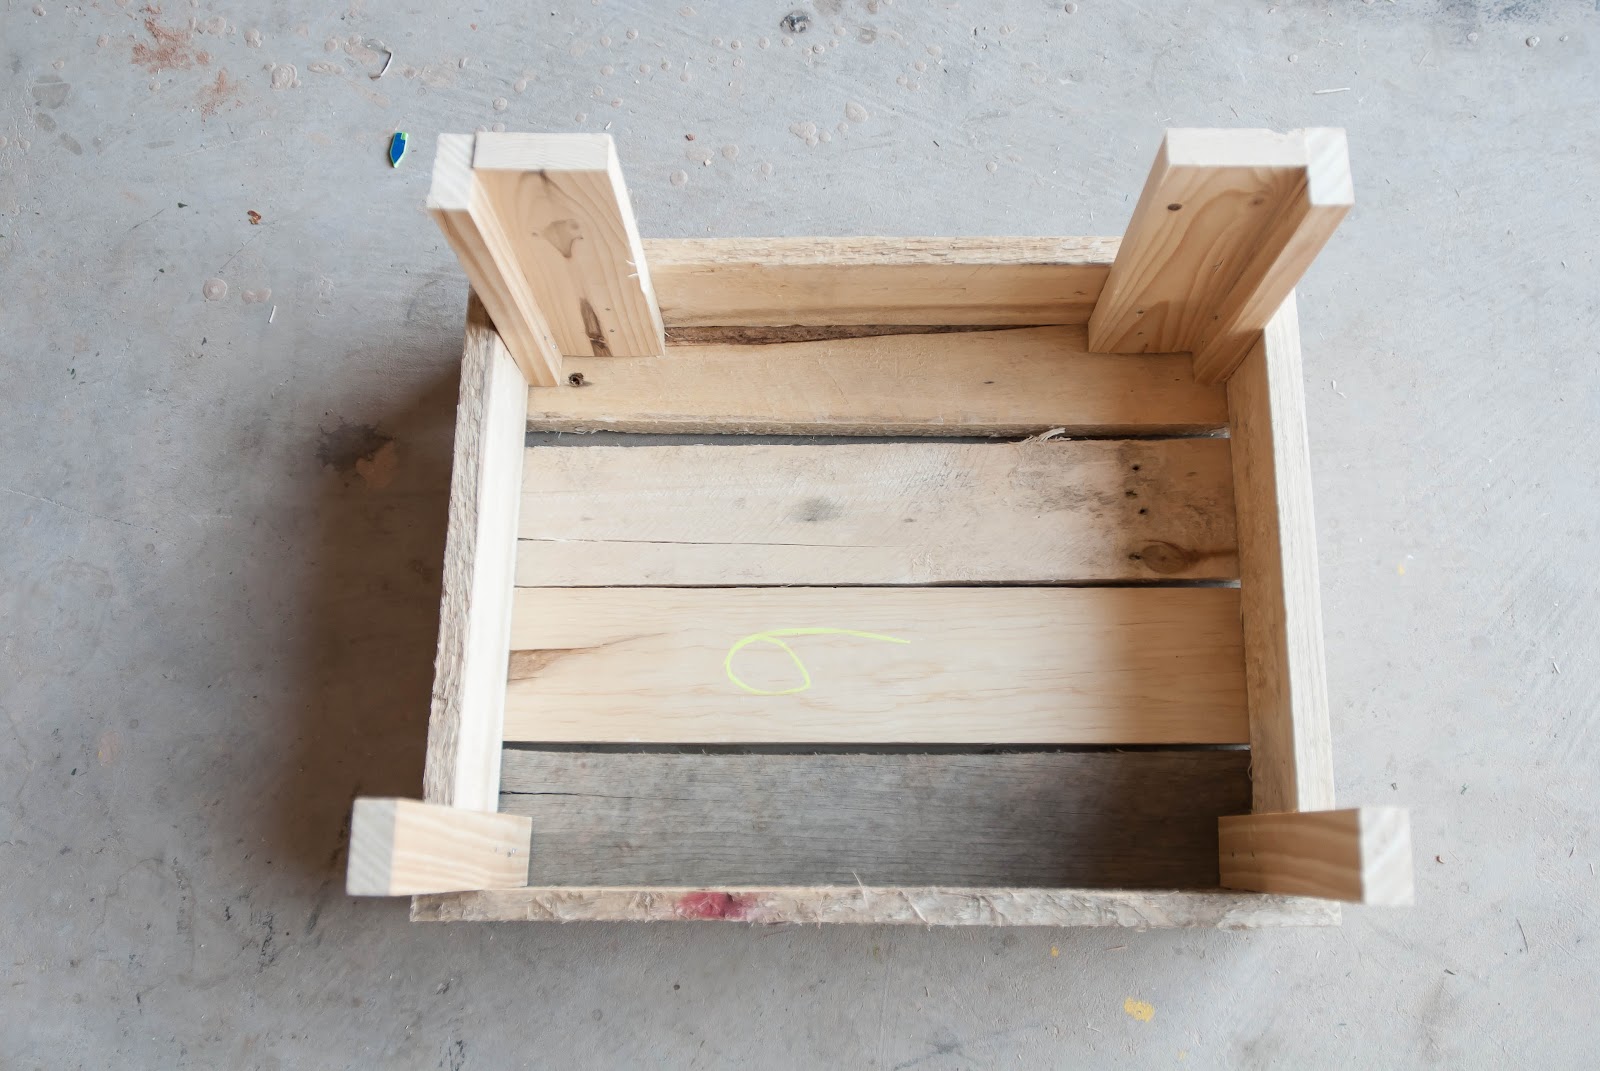
Next I added 1x2s in each corner, those measurements just depended on how tall I wanted the crate/stool to sit.  At this point I was still going to make a crate but then I flipped it over to make sure it was sitting high enough and I thought it looked pretty cute as a stool.   


So I added 1x3s next to the 1x2s to give the legs added support. Plus, I wanted the legs to have more of a stocky look.  I nailed the legs into the frame and also to each other to help hold them tightly together.  Once again since I was making it up as I went along I didn't use wood glue but I would highly recommend it! 


I actually only did that to the front legs but only because I ran out of  1x3s.  I will do the same to the back legs when I can get more wood.

Look how fun it's starting to look!  So much more cuter looking than a crate...I think anyways


Next, sand down any rough edges or rough surfaces.  Then paint.  I'm a big fan of spray paint, so much easier and faster!


I ended up making a another stool but made it a little smaller.  I did everything the same except I had 2x2s that I used for the legs.


This is how it turned out in the photoshoot.  It was kinda funny how the blue matched her outfit exactly :) If you want to see more pictures from that session click here.


Have a great day!

Chelsea
Pin It!

Wednesday, April 25, 2012

Garage Work table

During my birthday in March I asked for a chop saw.  I know that might sound like a weird request but I love being able to make things for my home.  A long time ago my husband got me a jigsaw and I love it but I felt the need for something that I could make angle cuts and more efficient straight cuts.  My hands most the time just aren't steady enough to get a perfectly straight cut.  So my wonderful husband got me a chop saw. :)  I'm very excited!! I already have a list a mile long of projects I want to make. 

Only there is one problem.  I had no table to put it on.  Well that just had to change, so here is how I made a work table for my garage.  I have a pile of wood that something has to be done with, so this table was made with supplies I had on hand. 

First I measured the area where I wanted my table to be. Then I had some plywood that I cut down to that size with my jigsaw.  Then I made a frame for the plywood to sit on out of 1x4s.   


Then I placed the plywood on top and nailed in place.


Then I flipped it over.  I knew since my plywood isn't very thick that I would need to reinforce it to make it stronger.  So I cut 2x4s down to size and placed them in the center.  I tried to space them out evenly then screwed them in place. 


Now for the legs of my table.  I have 2 extra headboards that I didn't need and was very tempted to take them to DI or chuck them but I really liked the posts on them and knew they would make perfect legs for my table.  So I pulled them apart and luckily they were about the right height that I wanted.


Using 2 1/2 inch screws I secured the legs in place.


Flip the table over and Wah La! 


Now I have a nice big work space to build!  It might be sad how excited I am about it :)
I have an idea of what to put on the wall behind the table to help organize our tools.  I'm excited to show you! Hopefully I'll be able to get that done in the next week.

Happy building! :)

Chelsea
Pin It!

Thursday, March 8, 2012

Outdoor Side table (from pallets!)

As promised here is what I've been working on with my lovely pallets.  I have a bench out in front of my house that I made last summer and I wanted a little side table to go next to it.  So here is the steps I took to make it:

First, I pulled the pallets apart, one board at a time.  This was a little tricky.  I used a crowbar and hammer and since this wood has been well used I had to pry it up slowly and carefully so that the wood didn't split.  There was lots and lots of nails in it so I took each one of them out and finally was left with a handful of 1x3's and 1x5's and 6 2x4's.

The 2x4s all have notches cut out of them, like in the picture below, but this wood is very sturdy/good wood.  As I was working with it I was surprised as how hard it was.
Since this wood was so strong I wanted to use it for the legs of my side table.  I liked the look of the notches so I made my cuts from the top down and then from the bottom up.  That way I was left with 4 legs that were the same.

I attempted to make all my cuts before I started putting them together.  I don't think it has to be done that way, it just makes the project come together quicker.  I did, however, mess up on one of my measurements and had to redo that.  So I'd just suggest making sure you know what measurements each piece of wood needs before making cuts.  Otherwise you could end up with lots of extra scraps.


I cut the legs 17 1/4th inches (btw I used a jigsaw for all of the cuts in this project) which left me with this little notch at the bottom.  I was tempted to leave it that way but figured in the end it wouldn't look right so using my jigsaw I cut the notch off each leg.


There that looks better, don't ya think?

Now using the 1x3s I cut out 4 side aprons at 9 1/2 inches.  Using a drill and 2 1/2 inch screws, screw one of the aprons to two legs keeping the apron flush with the outer side of the legs. Make another one, so you are left with something like this:

Next, attach the other two aprons to the other sides joining both leg sets together.  Like picture below.  This part was a little tricky for me.  Since I decided to leave that top notch the way it was and I didn't have super long screws that could have gone straight in.  I had to drill my screws in at the top and bottom of my 1x3s at a diagonal into the legs.  I believe I used 2 inch screws for that. Once again leaving the aprons flush with the side of legs.


I apologize I got a little carried away and forgot to take pictures of the next couple steps.  Hopefully these pictures I took after the fact will help explain what I did next.  I used 1x2s for the next couple steps.  I probably could have done it with the 1x3s but I liked the look of the 1x2s better and happened to have them on hand from past projects.   So I cut 2 1x2s at 9 1/2 inches (this is your side supports) and 1  1x2 at 14 1/2 inches (this is your stretcher).  These will be your supports that go near the bottom of the legs.  This helps hold everything tight and sturdy. 

Both side supports will go between the legs. I measured and marked up from the ground about 3 1/2 inches on the legs, this is where you want the supports to go.  Again, I used 2 1/2 inch screws to drill them in place. Then the stretcher is centered then drilled between the side supports.  Should look like the picture below.

Next, I cut 4  14 1/2 inch out of the 1x5s for the top of the side table.  The 1x3s would have worked as well, I just decided I liked the look of the 1x5s for the top better.  Just make sure you are left with a one to two inch over hang around the table.  Using my hammer I nailed in place the top boards with finishing nails.   Then finally I sanded the table down. I could have also went in and filled in all the nail holes with wood putty. I decided not to though I think it gives my side table some character. It's made out of pallet wood, it's not supposed to look perfect.

I decided I want to stain it but just haven't been able to get the stain yet.  I couldn't wait to show you so I'm sorry it isn't 100% done yet.  I will post another picture when I have it stained.

I'm envisioning a warm spring day with a little pot of flowers on top of my cute side table and me sitting on the bench with my book and a cool drink. While my kids ride their bikes and happily play with each other.....

Hey, I can dream can't I?!

Hope spring come soon!

P.s. I may or may not have made any sense while typing this so please don't hesitate to ask any questions!

P.s.s.  If you've enjoyed the projects I've shared so far click the tab on the right top of the page and please become an official follower. Thanks!

Chelsea
Pin It!