
I thought I'd dive into a few Easter projects. I really don't have a ton of decorations for this holiday and decided that needed to change this year.
I had a thought a few days ago that my kids need holiday decor around the house that they can actually touch and play with. What a concept, right?! So the chick bean bag was born....

This is a good afternoon project. I tried to just use material I already had so the only thing I went out and bought for this was beans. They were one dollar a bag and I bought three bags but only used two. Here are the steps I took to make these cute little chicks:
First either trace or print out an oval or egg shape. Mine are around 5 inches long and 4 inches wide. Cut two pieces of fabric big enough to fit the egg on it with 1/2 inch around all sides. Trace shape with a fabric pencil onto the fabric. Do not cut out yet.

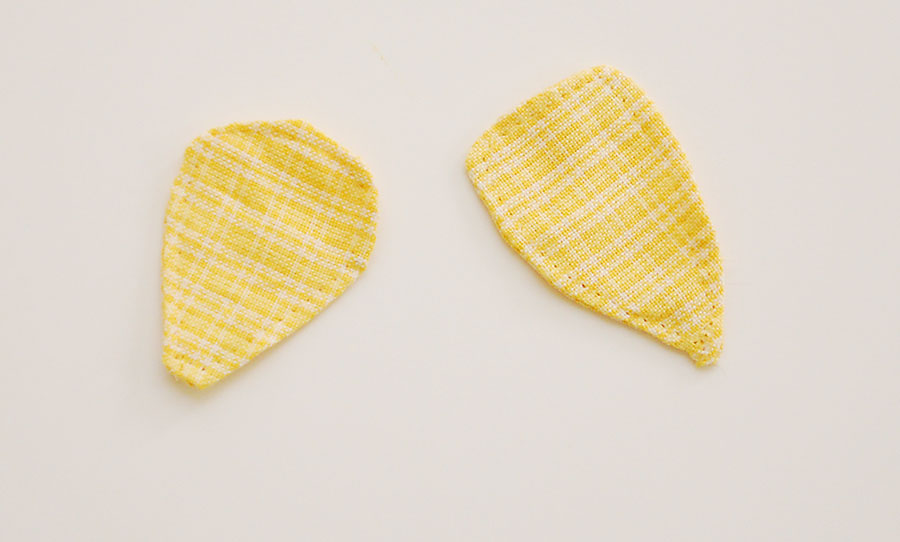
Next you will want to trace pieces for the wings. I drew a teardrop shape, also double layers for both wings. After cutting the wings out, place right sides together then sew around leaving a small opening to turn inside out.

Once it is turned inside out, sew a top stitch around wings. You will be left with something like this:
Next, cut out a triangle for the beak. It took me a few tries to get it the size I wanted. Just experiment.

Now sew on only the top part of the wings onto your top piece of the chick body. Next, sew on the beak around all sides.

Then I sewed on buttons for the eyes. I actually ended up switching these bigger buttons out for smaller ones. I liked the look of the smaller better. Now with both your body pieces together (wrong sides facing) sew around the body. Following the lines you traced earlier, leaving a small opening at the bottom.

Now fill with your beans. I used lentils because they were smaller but use whatever you would like. Then I placed a pin up against the bean to hold them up while I sewed the hole closed.


Finally using your scissors clip around the chick leaving about a 1/4 inch of fabric.
There ya have it.

You could also do the same to make eggs. Only when sewing the fabric together put them right sides together and turn inside out before filling. Then using needle and thread use a whip stitch to sew the hole closed.

Made some kids happy!


That's it for now!
Chelsea

No comments:
Post a Comment